
To create or edit a conditional route, follow these steps:
1. Click Add or click Edit for an existing Conditional Route.
|
There is a limit to the number of conditional routes that can be added. If you receive a "limit exceeded" message, contact your service provider to request additional routes. |
|---|
2. Complete the fields in the Conditional Route Info panel as described below.
3. Click Save.
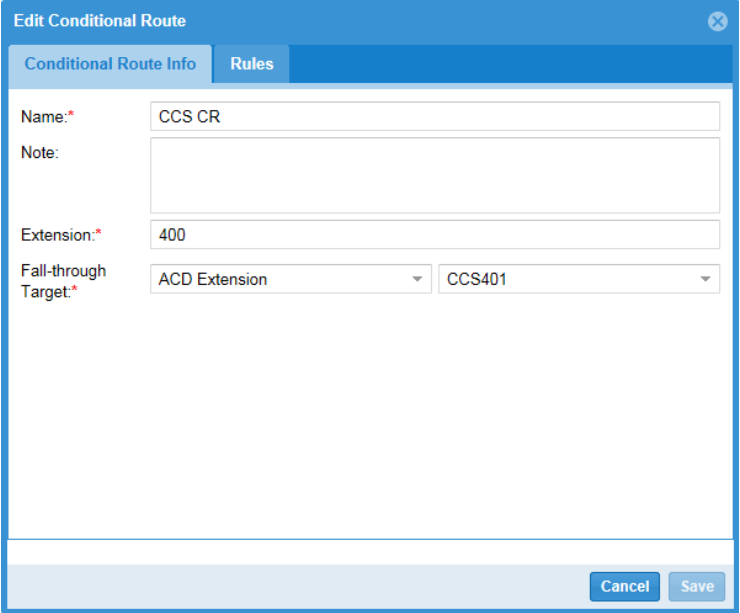
Field Definitions
• Name: the name of the Conditional Route.
|
Names can only contain letters, numbers and spaces. |
|---|
• Note: a brief free-form description or note.
• Extension: the extension that directs calls to this Conditional Route. If the Conditional Route is going to be dialable from a desk phone (or from any basic function like Incoming Call Routing), the extension must be a valid, otherwise unused extension. The number of digits must match other extensions for this tenant. The first digit of the extension must put the extension in the User/Location range. If the Conditional Route does not need to be dialable, ANY extension not already in use in the ACD system can be used.
• Fall Through Extension: the extension to which calls are routed if none of the Rules yields a True result. Fall Through Extensions can be other ACDs, including Queues and Conditional Routes (other than the extension of the Conditional Route you are creating) or other PBX extensions when "Other" is selected.
|
A Menu cannot be the Fall Through Target for a Conditional Route. |
|---|
Once these parameters have been saved for the first time, use the Rules panel to configure rules for the conditional route. Initially empty, this panel presents the list of true/false rules that are tested sequentially when a call is delivered to this Conditional Route. When a new rule is created, it is automatically added to the bottom of the list.
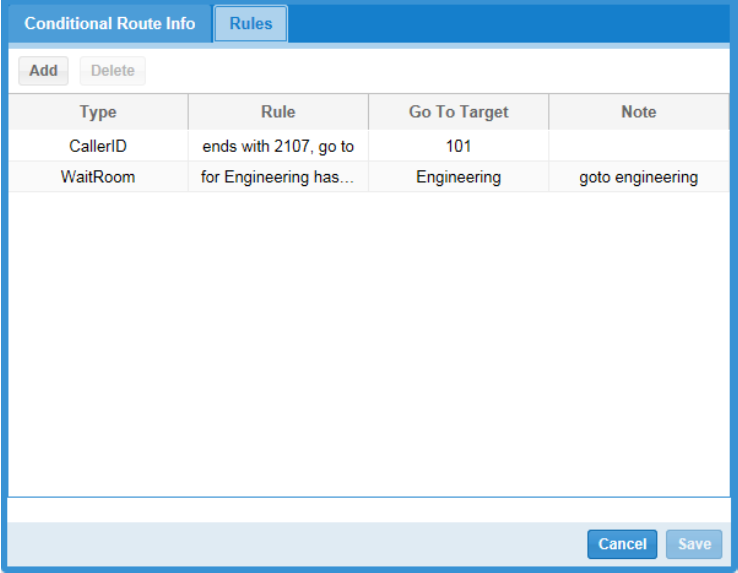
Field Definitions
• Type: the type of rule, either: DateTime, CallerID, or WaitRoom with the first rule that is found to be true, the order of Rules is critical in a Conditional Route. Click and-drag a rule to change its order.
• Rule: a system generated description of the rule.
• Go to Target: the extension or queue to which the call is routed when this rule tests as True.
• Note: a user-defined note related to the rule.
Actions:
• Add: click to add a new rule.
• Delete: click to delete the selected rule.
Types of Rules
The following types of rules are available on the Add Rule panel:
• DateTime
• CallerID
• WaitRoom
Use the drop-down box in the Type field to select the type of rule. When you make your entry, the options for the Rule field change to match your selection.
DateTime Rule
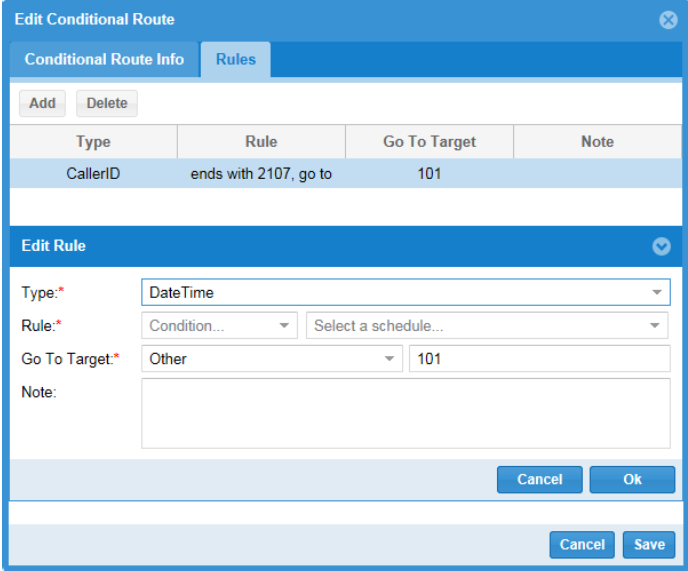
To create a DateTime rule, follow these steps from the Rules panel:
1. Click Add or click Edit for an existing rule.
2. From the Type drop-down, select DateTime.
3. Configure the Rule Options. Select a condition and a Schedule.
|
A schedule must first be configured in using "Schedules and Holidays" |
|---|
4. From the Go To Target drop-down, select a type of target and an extension or queue.
5. If required, enter notes about the rule.
6. Click Save.
CallerID Rule
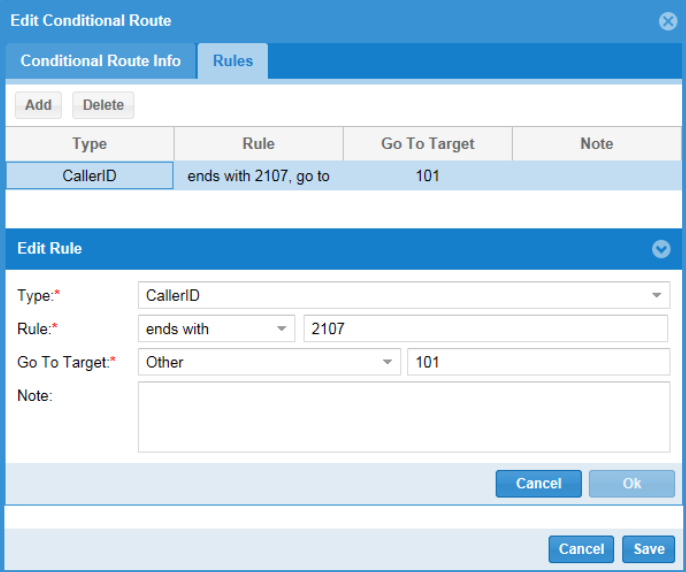
To create a CallerID rule, follow these steps from the Rules panel:
1. Click Add or click Edit for an existing rule.
2. From the Type drop-down, select CallerID.
3. Configure the Rule Options. Select a condition and enter a Caller ID.
4. From the Go To Target drop-down, select a type of target and an extension or queue.
5. If required, enter notes about the rule.
6. Click Save.
WaitRoom Rule
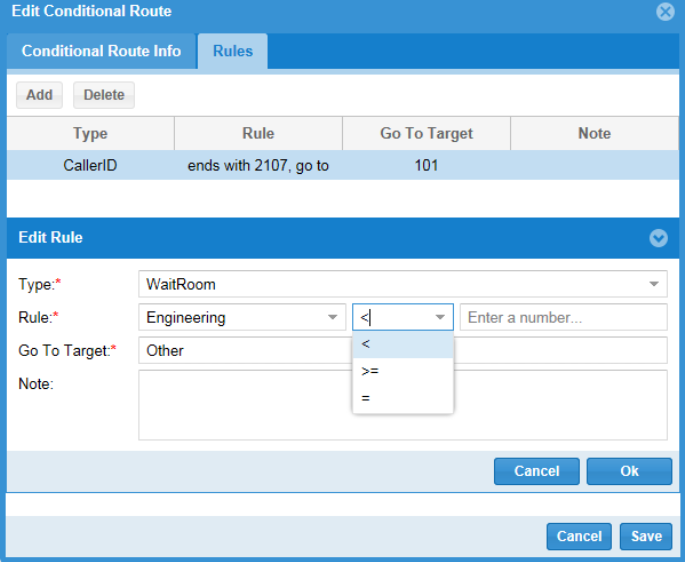
To create a WaitRoom rule, follow these steps from the Rules panel:
1. Click Add or click Edit for an existing rule.
2. From the Type drop-down, select WaitRoom.
3. Configure the Rule Options. Select a queue, condition and enter a number between 1 and 1000.
4. From the Go To Target drop-down, select a type of target and an extension or queue.
5. If required, enter notes about the rule.
6. Click Save.
Delete Conditional Routes
To delete a conditional route, follow these steps:
1. Click the Delete button on the Conditional Routes page. ACD displays the Delete dialog.
2. Click Confirm Delete.
|
If the Conditional Route was defined as "Dialable", this action also deletes the Conditional Route from the Admin Portal on the ACD Applications page. Within a few hours the SIP terminal created for this Conditional Route also disappears from the Phone Inventory page. |
|---|