Example Create a Custom Auto Attendant for Voicemail Access
This topic provides an example of how to create a custom Auto Attendant that will be used exclusively for voice mail retrieval and voice mail deposit.
A voicemail retrieval Auto Attendant is useful when the users at your company are frequently out of the office and they require easy access to their voice mail box.
A voicemail deposit Auto Attendant allows for direct access to a user's voice mail box without ringing their phone. It can be used to transfer a caller directly to a user's voice mail box.
Part A: Create Auto Attendant
- Expand Company Settings and click Auto Attendant in the left menu.
- Click Add.
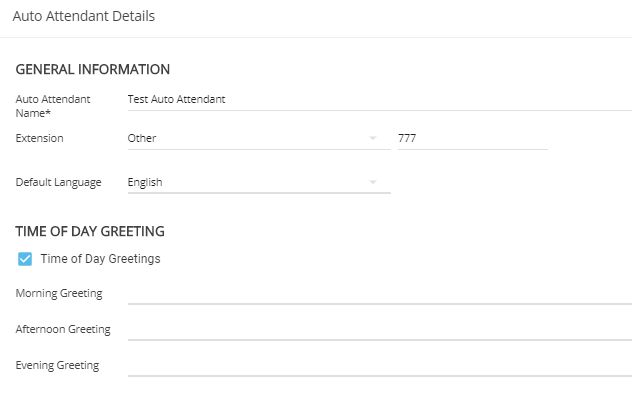
- Type the Auto Attendant name and extension in the General Information section.
- Select English from the Default Language list.
- Check the Time of Day Greetings box in the Time of Day Greeting section to turn on the Time of Day Greetings. Type prompt text in the fields provided for each Time of Day Greeting.
- Good morning
- Good afternoon
- Good evening
Part B: Configure the Auto Attendant Main Menu Options
- Click Main Menu in the Auto Attendant Menu section. This will automatically save the Auto Attendant that you created in Part A.
- Type text in the Introductory Prompt field for the Main Menu menu prompt:
"You have reached the automated voice mail access menu."
3. Define the Auto Attendant Main Menu menu option for each phone Key by selecting a choice from the Send Caller To list. At the same time type prompt text in the Wording for Prompt fields that you can use as a reference when recording your prompts.
Because this Auto Attendant is being created exclusively for voice mail access, the configuration for phone keys described below has been limited to the Voicemail Deposit and Voicemail Retrieval options. All other keys are configured as invalid.
- Phone key "1" is defined as the Voicemail Deposit option.
- Phone key "2" is defined as the Voicemail Retrieval option.
- Phone keys "0", "3-9", "*" and "#" are defined as an Invalid Key option.
4. Accept "3" as the default number of times that you want the Auto Attendant menu prompt to be repeated from the Play menu prompt list.
5. Accept the default action of "System Disconnect" that is configured for the case when the caller to the Auto Attendant does not make a selection.
6. Click Save.
Part C: Record your Greetings and Prompts
- Click Save and Record at the bottom of the page.
- Confirm that the extension of the telephone you will be using to record the prompts and greetings matches the extension in the Extension field. Type a different extension if required.
- Click Call.
- When the phone rings, lift the handset.
- Listen to the audio instructions: "Please record your message after the tone. When you are finished, press "#" for more options".
- When you hear the tone, record the prompt into the handset. Use the prompt text on the Record Prompt page as a reference for what to say.
- When you are finished, press the # key.
- Choose from the following options:
- To replay greeting press 1.
- To save greeting press 2.
- To re-record greeting press 3.
- To exit without saving press *{ }.
Click Record and repeat steps 1 through 8 for the following:
- Afternoon Greeting
- Evening Greeting
- Main Menu prompt
- Sales Menu prompt
- Service Menu prompt
9. Replace the handset.
10. Click Done.
The voice mail Auto Attendant is now saved with a custom phone key option configuration and matching custom prompts and greetings recordings.
Part D: Test your Auto Attendant
Test your set-up by calling the extension that you have assigned to your Auto Attendant. Listen to the prompts and greetings to ensure that you are satisfied with them, then select each of the phone keys to ensure they respond as you expected.
Part E: Provide Access to your Auto Attendant
To provide access to your Auto Attendant from an external phone, assign one of your incoming phone numbers to dial directly into the Auto Attendant. See Incoming Call Routing.