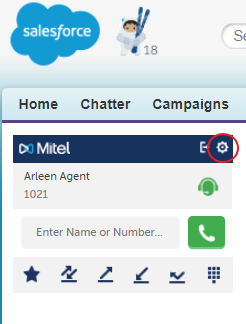
Configure Call Center
After the installation is complete, you must customize a Salesforce Call Center for each OfficeConnect Enterprise platform and add Salesforce users to each Call Center. Each Salesforce user must have a custom user profile that allows access to the OfficeConnect Enterprise objects.
1. Log into Salesforce with your administrator credentials.
2. Click Setup in the Salesforce banner if your default view is not the administration setup view. A menu of items appears on the left side of the screen.
3. Do one of the following:
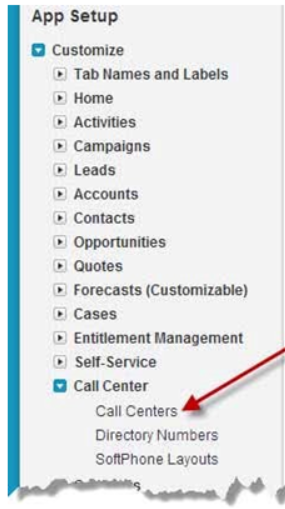
- Classic: Select App Setup > Customize > Call Center.
- Lightning: Select Feature Settings > Service > Call Center.
Note: App Setup field is set to Build in the Salesforce sandbox environment as seen below:

4. Click Call Centers. The main part of the screen is refreshed, displaying a list of configured Call Centers.
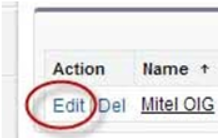
5. Click Edit for the Call Center you want to configure.
The screen is refreshed with the Call Center details.
6. Enter the Call Center configuration details on the Call Center Edit screen.
The values for you to enter in the pixelated fields will be provided to you by a UniVoIP Provisioning team member.
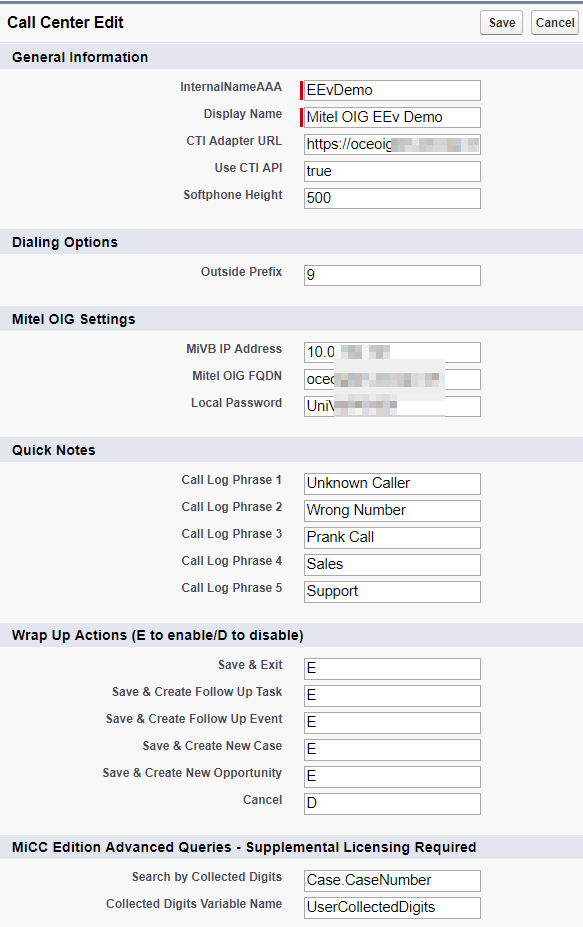
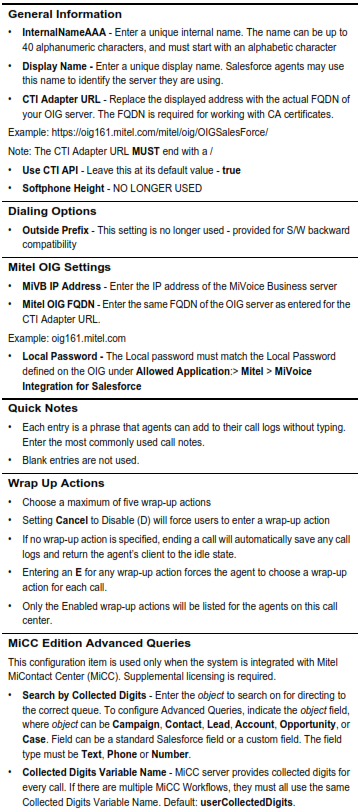
These settings apply to all users on this Call Center.
7. Enter all of the required values, and additional values, if desired. Required fields are marked with red bars.
8. Click Save. The screen refreshes to view mode for the call center details.
9. Edit any additional Call Centers (one call center for each OfficeConnect Enterprise system), as required.
MiCC Edition Advanced Queries field:
If setting up the search for collected digits, you must configure what kind of object the system will match on for displaying pop-up windows.
Table 1: | Configuring Advance Queries field FIELD NAMES | |
Campaign | Campaign Name | |
Contact | Assistant (AssistantName) | |
| Asst. Phone (AssistantPhone) | ||
Data.com Key (Jigsaw) | ||
Department (Department) | ||
Description (Description) | ||
Mobile (MobilePhone) | ||
Phone (Phone) | ||
Other Phone (OtherPhone) | ||
Title (Title) | ||
Lead | Company (Company) | |
| Company D-U-N-S Number (CompanyDunsNumber) | ||
Data.com Key (Jigsaw) | ||
Mobile (MobilePhone) | ||
Phone (Phone) | ||
Title (Title) | ||
Account | Account Number (AccountNumber) | |
| Account Site (Site) | ||
Data.com Key (Jigsaw) | ||
Company D-U-N-S Number (CompanyDunsNumber) | ||
NAICS Code (NaicsCode) | ||
NAICS Description (NaicsDesc) | ||
Phone (Phone) | ||
SIC Code (Sic) | ||
SIC Description (SicDesc) | ||
Trade Style (Tradestyle) | ||
Year Started (YearStarted) | ||
Opportunity | Next Step (NextStep) | |
| Opportunity Name (Name) | ||
Case | Case Number (CaseNumber) | |
| Contact Fax (ContactFax) | ||
Contact Mobile (ContactMobile) | ||
Contact Phone (ContactPhone) | ||
Internal Comments (Comments) | ||
Web Company (SuppliedCompany) | ||
Web Name (SuppliedName) | ||
Web Phone (SuppliedPhone) |
Custom field for DNIS search
Use the following procedure to add a custom field for collected digits.
1. In Salesforce Administration, do one of the following:
- Classic: Navigate to Setup > Build > Customize > Fields, as shown in the following graphic.
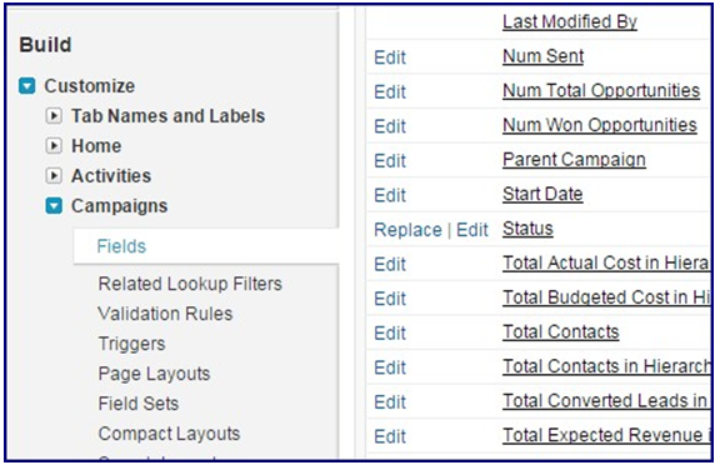
2. Scroll to Campaign Custom Fields and Relationships, and click New.

- Lightning: Navigate to Object Manager > Campaign > Fields & Relationships, and then click
New
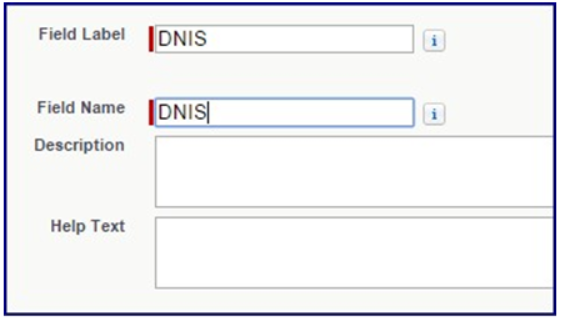
3. In the wizard:
a. Choose the field type. Select Phone and click Next.

b. Enter the details. Enter "DNIS" in Field Label and in Field Name, and click Next.
c. Establish field-level security. Leave all fields at their default values (no changes), and click Next.
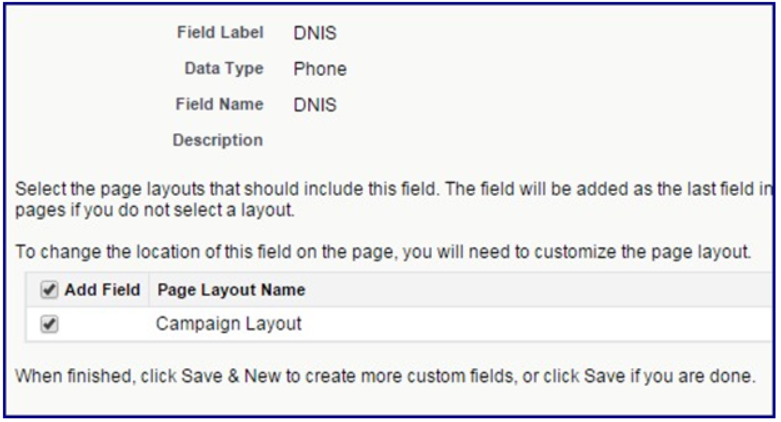
d. Add to page layouts. Leave all fields at their default values (no changes), and click Next.
e. To create another custom field, click Save & New. Repeat the procedure through the wizard.
f. To save and exit the wizard, click Save.

Logging call duration
You can configure Salesforce to log the duration of the calls.
To enable logging call duration:
1. In the Salesforce user interface, click Setup.
2. On Setup page, do one of the following:
- Classic: Navigate to Customize > Activities > Task Page Layout.
- Lightning: Navigate to: Feature Settings > Service > Call Center > Call Centers.
3. In the Task Layout, click Edit.
4. Drag and drop Call Duration, ANI, and DNIS to the Task Detail below.
Enable the sidebar for Cases
1. In Setup, do one of the following:
- Classic: Navigate to Customize > Cases > Page Layouts.
- Lightning: Navigate to Object Manager > Case > Page Layouts.
2. For the Case Page Layout, click Edit.
3. Click Feed View.
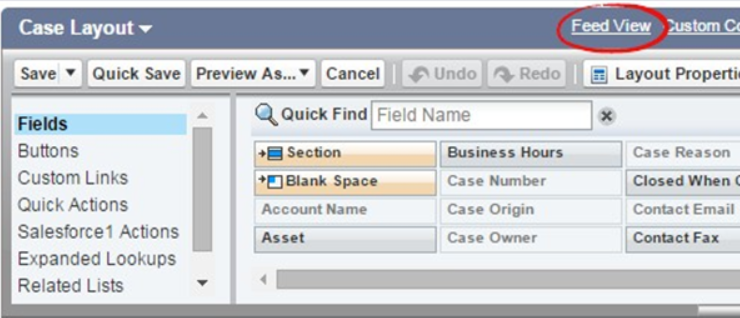
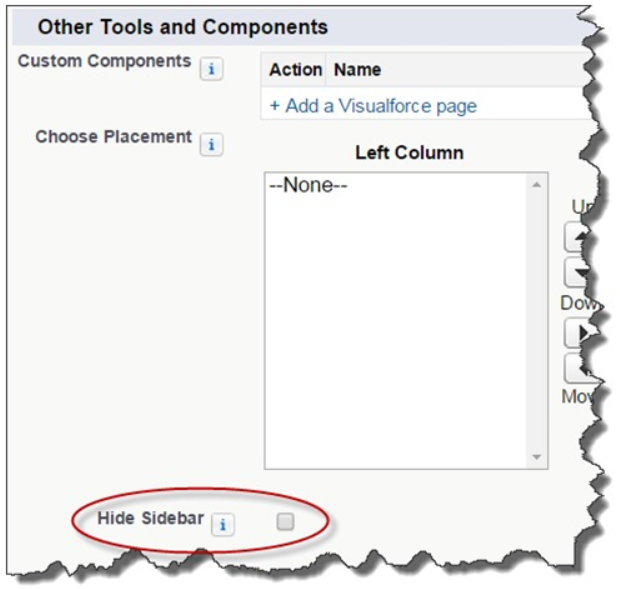
4. Scroll down to the Other Tools and Components section.
5. Deselect Hide Sidebar.
Add users to a Call Center
Salesforce users must be added to a Call Center to use the OfficeConnect Enterprise Integration for Salesforce. Users must also be configured on the MiVoice Business system that the Call Center is pointed to. Before adding users, make sure that you have a mapping of Salesforce users to Call Centers.
1. If you are already in the view mode of the Call Center, go to step "4".
2. Navigate to the list of Call Center as you did by following the steps at the top of this page.
3. Click the name of the Call Center. The screen refreshes to display all of the configuration details of the Call Center.
4. Click Manage Call Center Users. (located near the bottom of the page) The screen refreshes to display the list of users already added to the Call Center.
5. Click Add more users.
The screen refreshes with a dialog box that has drop down criteria for the search operation.
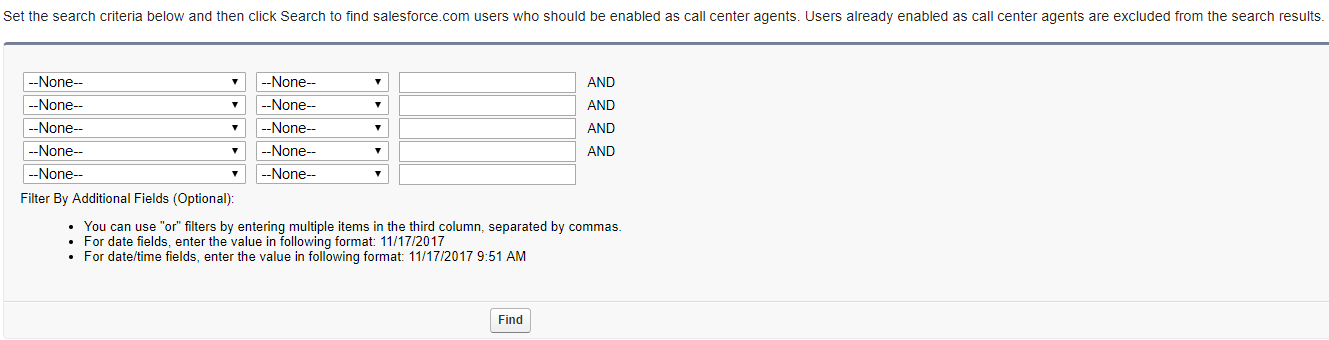
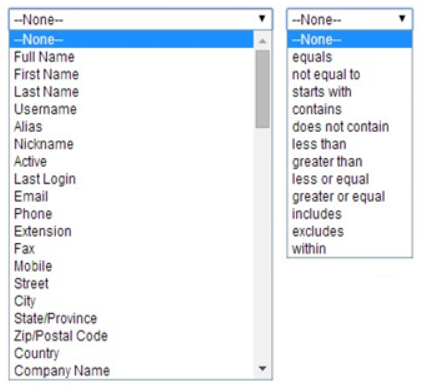
6. Enter the criteria and values to search for.
The users must already be configured in Salesforce. Users already added to the Call Center do not appear in the list.
7. Select the users you want to add to the Call Center, and click Add to Call Center.
8. Perform new searches and select users until all the users have been added to the Call Center.
9. Confirm that each new user added to the Call Center has the correct phone number and profile type specified in their Salesforce user profile.
Notes:
- Each user must have a phone number entry. Normal practice is to use the Extension Number in the phone number field. MiVoice Integration for Salesforce works only on the prime line of the user.
- When a user is assigned the MiCollab ACD SIP Softphone number, Salesforce administrator needs to provide the login instructions to the respective user.
Create a custom Salesforce user profile
Salesforce user profiles define the privileges and features that Salesforce users can access and use. Salesforce users for the MiVoice Integration must have a custom Salesforce user profile.
Use the instruction is the Salesforce documentation to perform the following steps:
1. Copy an existing Salesforce profile to create a new custom profile (Custom-MiVoice user, for example).
2. Edit the custom profile to allow access to the following MiVoice objects: OIGUserFavorites
3. Save the custom Salesforce user profile.
4. Update the Salesforce users to use the custom profile.
Screen Pop-Up Order (Top Down Logic)
The screen pop-up order logic should be set within each user's Salesforce Interface according to how your integration is configured. For most customers, "ANI Search" should be at the top of the list so that the screen pop will be based upon the caller's phone number.
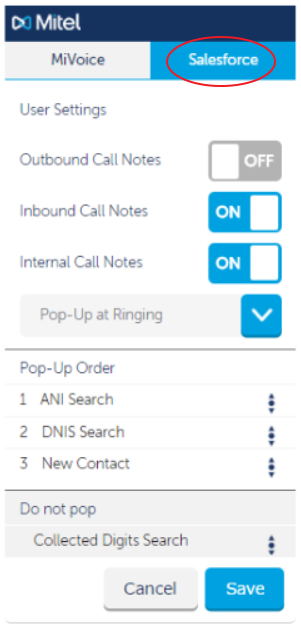
Be sure to notify each user of the required settings for their MiVoice Integration for Salesforce UI and what the incoming call matching order should be. The matching settings are:
• ANI Search - This option matches Salesforce contact records on the caller telephone number. ANI stands for Automatic Number Identification.
• DNIS Search - This option matches records on the Salesforce Campaign record. DNIS is the Dialed Number Identification Service.
• Collected Digits Search - This option matches records on the custom data (Collected digits) coming from the MiContact Center IVR system. If the incoming custom data matches an existing record in the Salesforce database, the Case, Account, or Opportunity record, for example, is displayed.
The default Salesforce record and field to search are defined in the Salesforce XML con- figuration file. The Collected Digits Search field type is one of "text", "phone", or "number". Refer to the Salesforce documentation for more information.
• New Contact: When this option is selected, a New Contact page is opened if the caller is not found in Salesforce.
Back to OfficeConnect Enterprise Edition Salesforce Administration Guide Menu