Create and Manage Reports: All reports are displayed, exported and scheduled as follows:

Display Reports
To display a report, follow these steps:
1. From the Reports menu, choose Inbound Voice Queues, Agent Performance or Evaluations.
2. In the Start Date, enter the month, day, and year for the beginning of the report or use the calendar icon to select the report start date.
3. In the End Date, enter the month, day and year for the end of the report or use the calendar icon to select the report end date.
4. For Inbound Voice Queues use the drop-down buttons to select an Aggregation Interval and the Queues on which to report. You can select multiple queues.
5. For the Agent Performance Report, use the drop down box to select the Agent(s) on which to report. To remove an Agent, click the X that follows the Agent's name.
Export Reports
Exporting a report allows you to copy the report results to your PC and use them in another application, such as a spreadsheet or database. The data is contained in a .csv (Comma Separated Value) file which can be opened with common PC applications such as Microsoft® Excel. When prompted by the browser, pick the target directory and change the name of the file.
Schedule Reports
Scheduling a report saves the report to the Scheduled Reports page.
To schedule a report, follow these steps:
1. Click "Schedule Report"
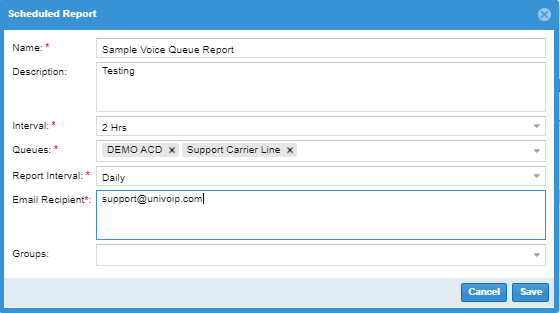
2. Enter a Name and Description for the report.
3. Select the Report Interval.
4. Use the drop-down list to select the Queues to include in the report.
5. Enter a valid email address.
The following validation rules apply to email address:
◦ Multiple email entries must be separated by commas.
◦ Each email address must contain the complete address format (xxxxx@xxx.xxx).
◦ Email addresses must end in 3 letters, for example, test@t.com, test@g.org.
◦ A space is allowed after each email address. |
|---|
6. Click Save.
The report is saved to the Scheduled Reports page.