Preferences (MAC)
From the Menu Bar, choose UniVoIP App > Preferences. The Preferences window appears.
Preferences – Application
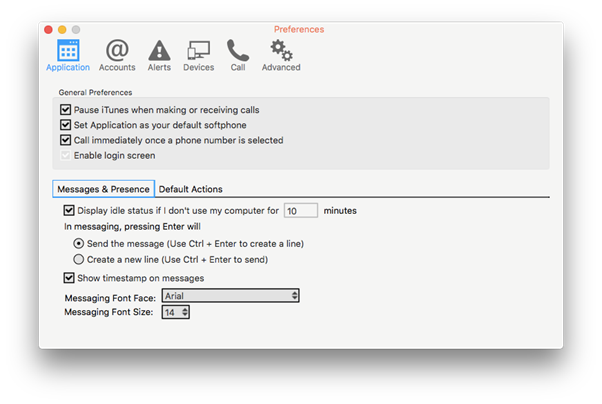
This panel lets you set your preferences for general GUI behavior.
Default Actions Tab
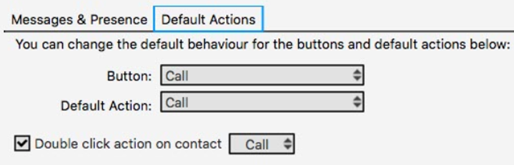
This feature lets you control the action performed for the Call and Transfer buttons and what happens when you double click on a contact.
Preferences – Alerts (and Sounds)
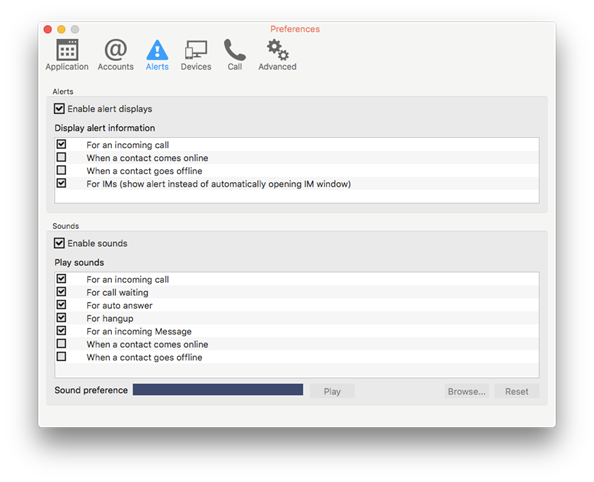
The tabs on this panel let you control the Call Alerts box and lets you assign sounds.
Alerts
You can control whether the Call Alert box is displayed in different situations.
You can also control how you are alerted to an incoming IM: either with a small IM Alert box or with the Messages window itself.
Sounds
You can assign specific sounds to a variety of actions or “events”.
Select the Enable sounds check box and select the check boxes for each desired event, or clear the Enable sounds check box to disable all sounds.
You can change the sound for each event: select the individual event. The value in Sound preference will change. Select the desired sound.
You can import sounds; these will be added to the list of sounds you can choose from when assigning a sound to an event.
Preferences – Devices
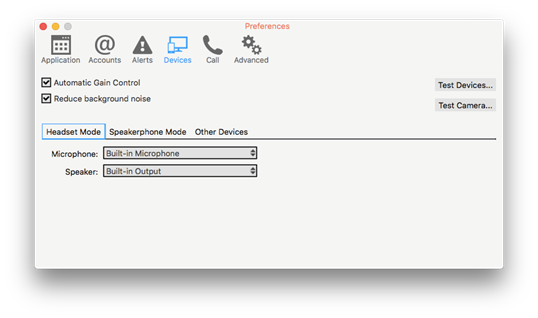
UniVoIP App automatically detects devices at each startup, and selects the most appropriate device for each purpose. If you do not like this selection, you can override it on this panel.
If you override a selection, it will apply the next time you start UniVoIP App, unless the device is no longer available, in which case UniVoIP App will again select the device to use.
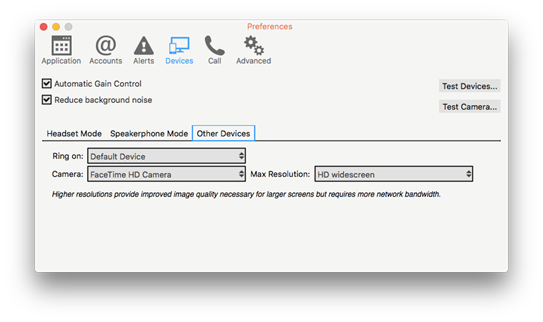
Camera setting can be found on the “Other Devices” Tab as seen above.
Preferences – Devices
Field | Description |
Automatic gain control | On to automatically adjust the audio gain. |
Reduce background noise | Automatically attempts to remove background noise. Typically on for the speakerphone. |
Test Devices | Used to test if your devices are connected. |
Test Camera | Click to check if UniVoIP App can use your camera. The video window opens, and shows a message. |
Speaker Microphone | Change these fields only if you want to override the devices that UniVoIP App automatically selected. In both these fields, select the headset you are using. The headset is the device that is usually used for the speaker (the sound you hear) and microphone (recording your voice). The only situation in which the headset is not used is when the Speaker Phone button on the dialpad is pressed. Therefore, unless you will always be using UniVoIP App in speakerphone mode, you must make a selection here. Select the headset in both the Speaker device field and Microphone device field. |
Speakerphone Mode | |
Speaker Microphone | Same as headset mode, but for the device to use when speakerphone is one (on the toolbar). Select None if you do not have a speaker phone. The Speaker Phone button on the dialpad will be disabled. You can set different devices for the speaker and microphone: for example, you can set the speaker to the speakerphone and set the microphone to your headset. |
Reduce Echo | Turning this feature on improves sound quality. |
Other Devices | |
Ring On | The device where you want to hear the phone ringing. |
Camera | Change this field only if you want to override the camera that UniVoIP APP automatically selected. |
Resolution | Set it to high if you have a good camera and a computer with a fast CPU. You will know that you have set the size too large if your computer slows down (the video is using too much CPU) or if the video shows black areas or is slow or jerky. Typically set it to low only in special situations, for example, when using Wi-Fi in a hotel. You will know that you have set the size too small if the video is fuzzy. |
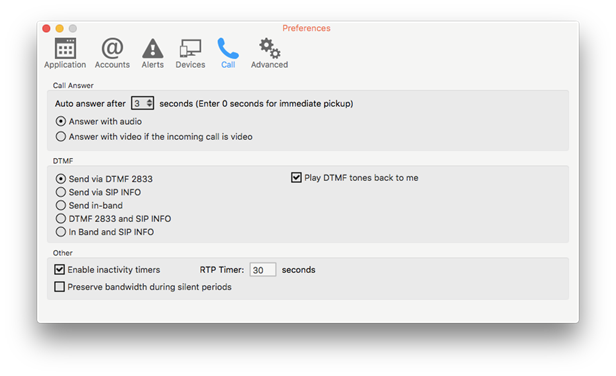
Preferences – Calls
Preferences – Calls
Field | Description |
Auto Answer | These settings let you configure how you want auto answer to handle incoming calls, when Auto Answer is enabled. |
DTMF | You may need to change the DTMF configuration if you cannot interact with interactive voice response systems (auto attendants, voice-activated menus, and so on). |
RTP Timer | This timer controls how calls are disconnected when UniVoIP App determines that there is a problem with the call and the other party has probably disappeared (assuming that you have not yourself detected the problem and hung up manually). Typically, the timer is enabled. It is recommended that you not disable it. You can change the length of the timer, but do not set it to less than 30 seconds. |
Preserve bandwidth | When this feature is on, UniVoIP App stops sending audio when you are not talking. When this feature is off, UniVoIP App always sends audio, which uses more bandwidth but may result in better call quality. Typically, off is the best setting, however, if you are using a slow (dial-up or ISDN) connection, you may want to turn it on. |
Preferences – Advanced
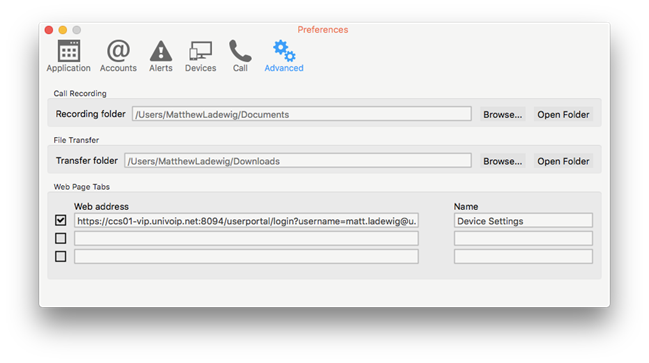
You can open or change the location of the folder that your Audio Recordings are stored in.
You can open or change the location of the folder that your Transferred Files are stored in.
The default Web Address should not be changed because it currently allows you to access your Device Settings.