Contacts
The phone system has the following three contact lists:
Personal Contacts
You can manage your own (and only your own) personal contacts, including
To view Personal Contacts, click Personal Contacts in the Navigation pane.
When logged in as Tenant Administrator, you only see your own personal contacts.
Add Personal Contacts
To add a personal contact, follow these steps:
- Click Personal Contacts in the left-hand menu.
- Click Add.
- Enter the Contact.
- Click Save.
- From the list of Personal Contacts, click the contact that you added.
The system returns the Add Personal Contact Field page.
- To delete a personal contact, check the box beside the Identifier and click Delete.
- To delete all contacts at once, click Delete All. Note that this operation might take several minutes to complete.
Limitations
See Import Contacts Limitations and Restrictions.
Add Personal Contact Field
To add a personal contact field, follow these steps:
- From the Personal Contacts page, click the Identifier of the contact.
The system returns the Personal Contact page for that contact. - Click Add.
The system returns the Personal Contract Field page. - Enter a value for Label, for example, business email address or phone number.
- Enter a value for Value, for example, an email address or a phone number.
When adding an external phone number, ensure you do not include the out digit. - Click Save.
To delete a personal contact field, check the box beside the Label and click Delete.
Import Personal Contacts
You can import contacts in two ways:
See Import Contacts Limitations and Restrictions.
Import Personal Contacts through CSV Files
You can import CSV files containing contacts.
You have to be logged in as a subscriber for this feature to work.
To import a personal contact list, follow these steps:
- Click Personal Contacts in the left-hand menu.
- Click Browse... and browse to the file location.
- Select the file and click Open.
- Click Import.
Note that it may take several minutes to complete.
When you import a CSV file:
- column headers in the file become the Contact Label
- column data becomes the Contact Value
Example 1
For example, the following format
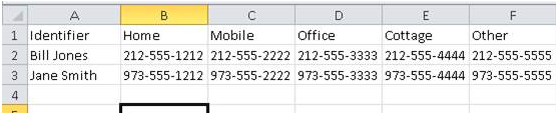
renders as
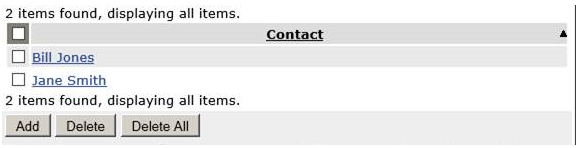
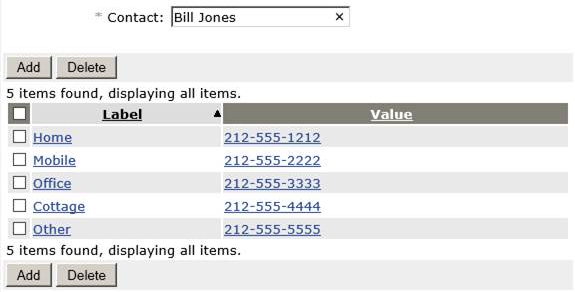
Clicking Contact Bill Jones expands the contact and display the list of phone numbers.
Example 2
The following format
displays as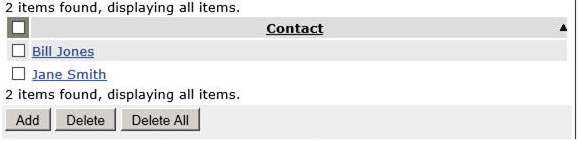
Clicking Contact Bill Jones expands the contact and display the list of phone numbers.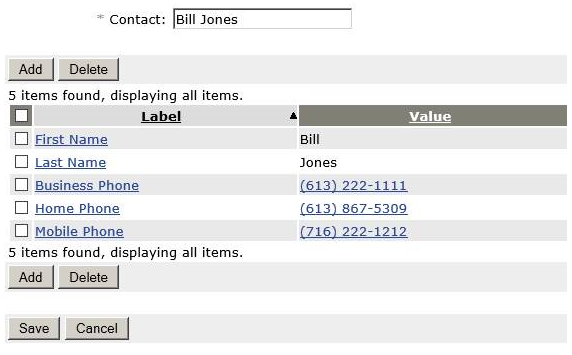
You can see that the Outlook Format also includes the First and Last name as contact fields.
Importing a CSV record where the Identifier is not taken to be one of the following will use the first non-empty column value or the contact will not be imported:
- the Identifier column value
- the concatenation of the <First Name>>:" "::<Last Name>
- the <First Name>
- the <Company Name>
See Import Contacts Limitations and Restrictions.
Google Import
You can import contacts from your Google account.
You have to be logged in as a subscriber for this feature to work.
To import contacts from your Google account, follow these steps:
- Click Personal Contacts in the left-hand menu.
- Click Google Import.
If you are not already signed in, the Google Sign in page is returned. If the following error is returned, contact your Telco 400. That's an error. Error: invalid_request Missing required parameter: client_id - Enter your Google account credentials.
Google asks you to let UniVoIP manage your contacts. - Click Accept.
UniVoIP imports your Google contacts.
Import Contacts Limitations and Restrictions
Limitations
The following limitations apply. When the maximum is exceeded, the system returns the associated error messages:
- 100 maximum fields per contact—Maximum allowed fields in a single contact limit reached. Extras ignored. Imported <0> fields of Contact <1>, where
- <0> is the number of fields that were imported/total in the contact
- <1> is the contact identifier that is now missing fields.
- 70000 maximum fields total—Maximum allowed contact fields limit reached. Extras ignored. Imported <0> Contacts, where <0> is the number of contacts that were imported/total in the file
- 3200 contacts—Maximum allowed contacts limit reached. Extras ignored. Imported <0> Contacts, where <0> is the number of contacts that were imported/total in the file
Contacts can be excluded when the contact limit and field limit have been reached, in which case the system returns both errors 2 and 3. It is also possible that exclusions in 1 result in no exclusions from 2.
Restrictions
The following restrictions apply:
- Importing a CSV file with any field Label length greater than 256 chars will abort the entire file.
- Importing a CSV file with any field value length greater than 256 chars will truncate that one value only.
- Importing a CSV record where the Identifier is taken to be the concatenation of the <First Name>::" "::<Last Name> will have those values concatenated before they are truncated and then truncated if it exceeds 513 characters.
Internal Contacts
To view Internal Contacts, select Internal Contacts in the Navigation pane.
External Contacts
Your administrator manages external contacts. You can configure external contacts as speed-dial options. See Company Speed Dial.
To view external contacts, click External Contacts in the Navigation pane.
Sort Contact List
You can sort a list from either contact page. See Internal Contacts and External Contacts.
To sort a list, select the column header of the field that you want to sort on. To reverse the sorting order, select the column header a second time.
Find a Person in Internal Contacts
To find a person, follow these steps:
- Click Internal Contacts in the Navigation pane.
- Type a First Name or Last Name in the For field.
The system filters the list as you type your criteria. If there are multiple results, you can sort the results. See Sort Contact List.
To restore the entire directory list, click Refresh.
To make a phone call or send an email message, select the appropriate extension or email link from the list.
Find an Entry in External Contacts
To find a person, follow these steps:
- Click External Contacts in the Navigation pane.
- Type a Name or Phone Number in the For field.
The system filters the list as you type your criteria. If there are multiple results, you can sort the results. See Sort Contact List.
To restore the entire directory list, click Refresh.
To make a phone call or send an email message, select the appropriate extension or email link from the list.
Click to Call
You have to be logged into a valid device for click to call to work.
To call a person or entry using click to call, follow these steps:
- Click Personal Contacts, Internal Contacts, or External Contacts in the Navigation pane.
- For Personal Contacts, click the Contact, then click the Value
- For Internal Contacts, click the Extension.
- For External Contacts, click the Phone Number.
The system displays a Calling pop-up window, which includes the Originating Extension, Originating Phone, and Destination Number. If the number is not dialable as is, the system includes a message telling you to provide additional digits to make it dialable.
2. If required, edit the Destination Number to make it dialable.
3. If you are logged into more than one device, select a device to originate your call from in the Originating Phone drop-down list. See Multi-desking.
If you log out from your originating (default) device, UniVoIP determines the default device in the following order:
- MiNET phones take precedence over SIP phones
- the device that has been logged-in the longest
4. Click Call.
The call is initiated on your Mitel phone in speaker mode. A SIP phone rings, and you have to initiate the call by selecting a line or picking up the receiver.
- When the party you are calling answers the call you can continue the call in speaker mode or you can lift the handset.
- If your call is not answered, you have to terminate the call on your phone by lifting and replacing the handset or by pressing Speaker.